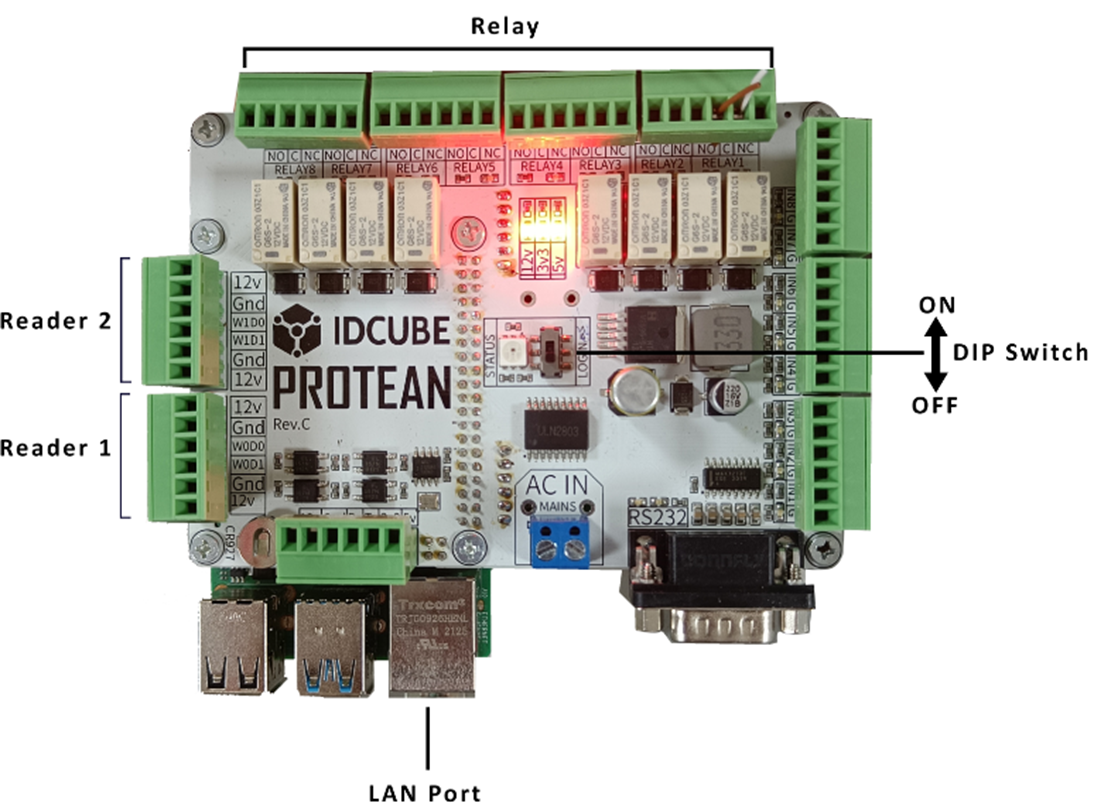
· Initial Setup: Upon receiving the IDCUBE PROTEAN V3 Controller, ensure that the DIP switch is in the OFF position.
· Powering the Controller: Connect the controller directly using an AC power cable or via a PoE switch.
· Network Configuration:
- The default IP address of the IDCUBE PROTEAN V3 Controller is 192.168.1.6.
- Configure your laptop or system to be in the same IP range to establish communication.
· Accessing the Web Interface:
- Set the DIP switch to ON and reboot the controller.
- Wait until Relay 8 LED turns ON, indicating that the controller is ready for access.
· Logging into the Controller:
- Open a web browser and enter the controller’s default IP address, followed by port 5000.
- Example: 192.168.1.6:5000
Use the following default credentials to log in:
- Username: idcubex
- Password: xebucdi

For default login Username is “idcubex“and Password is “xebucdi“.

· Enter the Required Network Details:
- Device IP
- Gateway
- Server Port
- Precamp
· Specify the Server IP Address.
· Select the "Standard Protean" option from the available configurations.

· In Server URL field, fill the following URL
SERVER URL :-http://server ip/Access360WcfService/WebServicerestApi.svc

NOTE:
SERVER URL :-http://server ip/Access360WcfService/WebServicerestApi.svc
*This link is accessible throughout the network.*